Tuesday 19 December 2017

Bedbug Bear crochet teddy

I just loved this bear as soon as I saw it and the idea that it catches bad dreams and keeps them in it's hat is so cute.

A FREE pattern (thank you Nina!) and easy to follow although there are a few times that it does not actually tell you to repeat the instructions all around the row, but I think only a very new crocheter would be confused so bear that in mind. There is also a point where it does not tell you to stuff before finishing off, but again common sense tells you to stuff it!

I did mine in double knit yarn with a 3.5 mm hook, so it came out larger than the pattern suggests, mine are around 10 inches tall. The hats I did just like the pattern suggests by making some triangles of fabric and sewing to fit. I suppose you could crochet a hat too.


I made these for two of my grandchildren and in the stitches that you do to make it look like scars, on the rear ones - near the tail, I actually made it into their initials so they know whose is whose.

As I mentioned earlier, I also liked the idea that these bears catch bad dreams, so made a label explaining this to go with them.


Link to pattern:https://www.ravelry.com/patterns/library/the-bedbugbear

One of my favourite patterns. Thank you again Nina for sharing it for free.


Happy crocheting!


___________________________________________________


___________________________________________________


Saturday 25 November 2017

Sleevless top - Drops Design 'Come Winter' 173-46

I bought too much yarn when I made the Rudolf jumper (you can see it here if you want) so wasn't sure what to do with the left overs, then I saw this pattern for a sleeveless top.

The pattern has open sides, like a poncho, but I didn't like that idea so simply sewed them up.

I didn't have enough yarn to do it all in grey so used the cream and made a split at the centre working one stitch out into the grey on each row to give a V design, I think it gives a nice effect and used up all the left over yarn. I also split the neck as I don't like roll neck, again I think it looks effective and looks nice when worn.

The yarn is Paintbox Simply Chunky and is lovely to work with.


Free pattern "Drops Design 'Come Winter' 173-46" can be found here: https://www.garnstudio.com/pattern.php?id=7528&cid=17

Happy knitting!


___________________________________________________


___________________________________________________


Rudolf Jumper - Drops Design 122/1


I've been planning to do this since last year. Left it too late then so this time started in October. It only took a week to knit, it grew so fast being thick yarn on big needles.

The pattern calls for super chunky but I was worried it would be too hot to wear at Christmas especially if cooking so opted for just a chunky instead, I did a few test pieces to get the tension right for the needles I had. I used 6mm.

I used Paintbox Simply Chunky. First time I've used it and found it lovely to knit with. Unlike some acrylic which can feel quite rough this was very smooth.


Because it is worked in the round there are no side seams to sew (Yay!!) you might have guessed I don't like sewing up knitting :)


The pattern is easy to follow although one thing I would point out to a new knitter is that it says to work stocking stitch, which is one row knit one row purl, however as this jumper is done in the round you only need to knit each row to get the stocking stitch effect.

I changed the colours to my own design. I thought brown reindeer would stand out more and I also felt that as there is only one Ruldof that he should stand out on his own with a red nose while the others have small black noses. I also changed the neck as I don't like roll neck styles. I just did it as the pattern but folded it back and sewed it down.

FREE pattern can be found on Garnstudio https://www.garnstudio.com/pattern.php?id=4761&cid=17


Happy knitting!


___________________________________________________


___________________________________________________


Miniature Cactus Garden

A change from my usual craft, crochet or knitting posts.

I had a lovely shallow vase which had been sent to me many years ago with a flower display in it. For a long time it has stood empty so I decided to do something with it.

I'm not a great gardener so bought some small cacti as I had read they can be fairly easy to grow and I thought they would look nice in the vase.

I used some fine gravel and cactus compost to fill the bowl and after adding the cacti at intervals around the edge with one tall one in the middle, I then added a few large stones which I had.

I'm very pleased with the results and only time will tell how well the cacti grown but I hope they will be slow growing and continue to look nice in the vase  for a long time to come. If not I will re-pot them into something larger.


Happy gardening!


___________________________________________________


___________________________________________________


Thursday 24 August 2017

Crochet Star Wars Ewok

My youngest two grandchildren just love Star Wars and recently they were showing me a book about the films. I commented "oh that looks like a little teddy bear" to which they delighted in telling me they were Ewoks.

They looked so cute that I knew there would be a pattern out there somewhere so off I went to my favourite place, Ravelry and of course I found one! It is by Lucy Collin http://www.ravelry.com/patterns/library/wicket-the-ewok

The pattern is very easy to follow although somehow I did manage to end up with 4 toes on the first one, but never mind, it will help the boys know who's is who's!

The hood did not come down as far as I wanted, it ended just at the bottom of the head,  so I just added more rows to make it longer:


 I used some King Cole Luxe Fur yarn that I had left over from something else, this was used for the face and ears however it is a nightmare to crochet with, you just can't see the stitches. I persevered on the faces but for the ears I made them in plain brown and then sewed the fur yarn over the front, it worked fine.

I used safety eyes and embroidered on the nose and mouth. 


This is the four toed one! 


I just know that my grandchildren are going to love these and can't wait to hand them over.

Really big thank you to Lucy for making this pattern and sharing it for FREE!

Happy crocheting!


___________________________________________________


___________________________________________________


Saturday 12 August 2017

Amigurumi Tiny Sloth

This pattern for a tiny little Sloth is so cute I just couldn't resist having a go.


This is my finished Sloth as you can see it is very small and fits around your thumb. I made it in an hour or two.


I used very small safety eyes as I don't really like embroidering them on and they also give a nice shine. I placed the eyes through the face part before sewing it in place.


I then embroidered around them to give the slanted eye look and added a nose


Lovely pattern, easy to follow with excellent instructions.

Thank you The Twisted Crocheter!


Happy crocheting!


___________________________________________________


___________________________________________________


Using Ravelry

I love Ravelry! - www.ravelry.com

Do you use it too?

There is so much available on this website that it is all too numerous to mention, so I will just give you my top five favourites and urge you to go and have a look around yourself.

1. Pattern search

You can search for patterns with lots of filters:
by just a simple one word search e.g. "cat" "amigurumi" "sweater" "coaster"
type of pattern - such as clothing or toys
by name of pattern
designer name
type of craft
yarn weight
hook or needle size
it's rating by others who have made it
search for free patterns only or paid ones too
search by yardage for pattern, if you know the yardage of your stash this helps you use it up.

There are many more options than those above, you are bound to find something to suit what you are looking for. You can also save your favourite search terms.

2. Favourite pattern

When you find a pattern you like you can add it to your favourites to find later.

3. Projects

Here you can save the projects you are currently working on, those you have finished or those you have given up on.
You can save details about it, add photos and notes, what yarn you used, what needle size, where you bought the yarn, link to pattern etc.
You can rate your experiences of the pattern and yarn too.

You can make your projects available to the public or just Ravelry members.

If you blog about your projects you can easilyadd a link to your blog post.

4. Contributions 

Here you can add your own patterns to share with others.

5. Library

Here you can save patterns that you have bought or downloaded for free so you can find them in the future. You can arrange them how you like - I like the 'bookshelf' option, it is easy to navigate and see what you have.

There is also an attached forum where you can discuss patterns and other topics. I haven't used this for chat myself but I did use it when having a problem with a pattern. A search bought up a discussion on the very problem I was having and I was able to get on with the pattern using the tips discussed.

There are tips, help, designers, links to events, messaging service to ask questions of those sharing their patterns. Yarns, books, hooks and other things to buy.

As you can see I love Ravelry and it is my first port of call if I want a pattern.

Here's a good example - last week my grandsons were talking about Star Wars and Ewoks. I said they looked like little teddy bears! I immediately thought "I bet someone has a pattern somewhere to make one" and lo and behold I found one almost straight away! I am currently making one each for my youngest two Star War fans. :)

Another feature I just remembered which I love, is the bookmarklet. Add a Ravelry bookmark to your browser and if you see a pattern on the internet that you like, simply click on it and if the pattern is in the Ravelry database you will be taken straight to it so you can add it to your projects or favourites. Details of how to add a bookmarklet are here: http://www.ravelry.com/blog/110

I hope you go and have a look and find it as amazing as I do.

Happy crafting!


___________________________________________________


___________________________________________________


Thursday 10 August 2017

Tutorial for making small Pom Poms with a Fork

Have you ever needed some very small pom poms but don't have any small enough or the shops are shut?

Here's how to make your own using just a fork - yes, just a normal everyday dining fork!

It is very quick and easy to do, the video speaks for itself so there is not much else for me to say except have fun making your own tiny pom poms.


Happy crafting!


___________________________________________________


___________________________________________________


Blake the Orangutan from Edward's Menagerie


Having seen mentions of the book Edward's Menagerie by Kerry Lord (Toft Alpaca) in quite a few places I was lucky enough to find a copy in my local library.

The library is a great place to find craft books and it gives you the opportunity to try before you buy.

When I had first finished him I didn't add any features but later thought he looked a little sad, as you can see adding just nostrils and mouth made a real difference.


If you don't want to borrow it you can buy it online at Amazon in both Kindle and paperback format: http://amzn.to/2vmMU6N

There are over 40 animals to make and I chose to have a go at Blake the Orangutan

The patterns all use a basic body and leg design with extra rows added or taken away depending on which animal you choose to do. I did find this a bit of a chore having to keep turning from one page, with the basic body parts on, then back to the pattern page for the specific instructions for the animal. I can see why they have done it that way though as it saves printing costs of having to write out each animal individually.

The pattern for Blake was easy to follow, what they call the 'fur' stitch I call the loop stitch - we all have different names for our stitches! If you would like to learn how to do the stitch I have a tutorial here, it is really easy once you know how: https://youtu.be/L-8g1HRjt1s
  
It was tricky remembering all the different parts to each round so I found it easier to write them down and tick them off as I went along. For instance you have to work a loop on every third or fourth stitch but at the same time increase or decrease in the round every few stitches so it is easy to forget where you are if you get distracted and miscount. 

Here is an example of my row count - we all have different ways of working and this works for me, you might find it useful:

In the top example V = increase in that stitch
0 = make a loop stitch - you therefore sometimes work a loop stitch on the second of the increased stitches.

In the bottom example:

The rectangle around two stitches [] = work those two together.
0 = make a loop stitch - you therefore sometimes work a loop stitch at the same time as working two stitches together.


I used Boyes double knit, it is a good quality yet cheap yarn. I used less than 100g for the main body and just oddments for the rest.

Here is my version of Blake - I've called him Pongo because that is the Latin name for Orangutan! :) Again these are before and after features were added, I'm sure you will agree he looks a lot nicer with a smile :)


Would I make it again? - Yes probably but I might add more loops, it seems a bit sparse, especially on the legs/arms. Plus I think I would make the arms and legs longer.


Happy crocheting!


___________________________________________________


___________________________________________________


Thursday 3 August 2017

Diagonal Box Stitch C2C Blanket

I made this blanket using the Diagonal Box stitch, sometimes known as the Corner 2 Corner stitch (C2C)

It is really easy to do and you can make square or rectangle blankets and also, if you stop with one long edge and don't decrease (thus making a triangle) you can use it as a shawl/scarf.

If you would like to have a go I have made a tutorial for the stitch - not the whole blanket as all you need to know is how to start and finish then you can make your own blanket as big or as small as you wish.


I started mine in Cygnet Kiddies Couture, Blueberry stripe. It looks lovely. However it seemed to be getting quite expensive so to help keep down the cost I used a plain white in the middle, it gives it a nice two sided effect I think.


It grew really quickly and is snuggly and warm.

I added a border after this picture was taken, you can see how it looks with the border on the video.


Happy crocheting!


___________________________________________________


___________________________________________________


Sunday 4 June 2017

My Greek Zig Zag Shawl

I was lucky enough to have the chance to visit Greece recently, the Greek islands in particular. What a stunningly beautiful place. The people are the kindest, most welcoming I've ever met.

Before we went I decided to make my own tribute to the beautiful island of Santorini by making a shawl in some of the colours found on the island. I chose a pattern by Drops/Garnstudio and wanted to do deep blue to signify the tops of the buildings, white for the walls of the buildings and a paler blue to signify the blue of the sea and sky. I bought Drops Safran yarn but sadly the 'ice blue' I chose turned out to be a mint green colour so I had to use only the turquoise and white.


I'm pleased with how it turned out and in this picture you can see Fira, the capital of Santorini, high on the top of the hill above my shawl.
If there are any Greek readers here, thank you for letting me visit your beautiful country, you should be very proud of it and all your hospitality.


Now for the pattern review ....

The pattern was Drops design 146-6 Edelweiss shawl and is available for free: https://www.garnstudio.com/pattern.php?id=6010&cid=17

The pattern suggested two strands of yarn group 'A' but as I wanted a lightweight shawl I decided to try it using a single strand of 4ply Safran. It came out fine and I used a 3.5 mm hook.

It took 3 balls of White (Safran 50g) and 4 balls of Turquoise (Safran 50g)

Like I said the colours I wanted to use sadly turned out not suitable but I was happy with the two tone result. I do love Safran yarn, it is smooth and easy to crochet with, it does not split like some cotton yarns. It has a beauitful sheen to it on finished items.

The pattern is easy to understand using basic stitches and due to the repetition it means that after a while you don't need to keep referring to the pattern because you get into a good rhythm of working, it grew very fast and was completed within a week.

You begin at the back neck with a magic ring or a few joined chains, and the shawl grows outwards and downwards as you work therefore you can make it as big or small as you wish simply by working to the size you want.

It is weighty enough to feel warm on a cool evening but the cotton yarn means it does not feel too hot around you if the weather does turn warmer.


You could experiment using any yarn, I'm sure the results would be just as beautiful.

Happy crocheting!


___________________________________________________


___________________________________________________


Sunday 7 May 2017

Quick and easy scarf pattern review

I had a few 50g balls of a 4 ply mint green cotton yarn called Safran by Drops/Garnstudio in my stash so wanted to find a pattern that could use it up.

I came across this one for a scarf which looked really pretty. It is a free pattern called 'Rose Acacia Scarf' and can be found on Ravelry here: http://www.ravelry.com/patterns/library/rose-acacia-scarf


I used two 50g balls and a 3.5 mm hook. It was a really easy pattern to follow, the chart is well set out and there is also written instructions, the crochet terms are US terms but easy to translate to UK terms as there is only one stitch apart from spaces, chains and yarn overs. This is the Triple Crochet (US) which is a Double Treble in the UK. It took me just a couple of evenings to make.

It did look rather thin so I decided to widen it slightly around the back neck, I'm not sure if I did the right thing but it looks OK. I widened it by working the first pattern repeat then increasing on the 1 st row of the next 4 subsequent pattern repeats, then working straight until I had the desired length. I then decreased in the same way on the other side.

It is a very versatile scarf which looks pretty tied at the front:


Draped around your neck:


or pinned with a scarf pin:


It did need blocking to bring out the full pattern, I blocked it out dry and then sprayed it with water and left it to dry.


 A lovely scarf with will look very pretty with different outfits from 'dressed up' to jeans and T.Shirt.

You could use any type of yarn and hook size, thinner yarn would give it a very lacy look and feel, thicker yarn would give a warmer scarf.

Thank you Zsu's Designs for sharing your pattern for free.

Happy crocheting!


___________________________________________________


___________________________________________________


Saturday 6 May 2017

Creating Stitch Charts for Crochet Knitting and Crafts

Some time ago I made a video tutorial to make a crochet butterfly stitch to incorporate into your work. You can see the video here:


Someone asked on the video comments if I could make a chart for the pattern. I know that some people like charts, some like written instructions and some prefer a video to follow so they can crochet along. We are all different in the way we work and I was keen to help by making a chart for this subscriber. 

However it is something I've never done before, I've used many charts myself but never made one. I tried drawing out the stitches on paper and it worked fairly well but was so time consuming and twice I made a mistake on the last row which meant I had to start drawing from scratch - it was so annoying and I was cross with myself! It looked something like this and was not great.


 I decided to try a quick internet search to see if there were easier ways to make charts and one of the first things that came up was a site called Stitch Fiddle. https://www.stitchfiddle.com/en/chart/new

Well this site changed my day! It took me a while to understand how it worked but it was easy to use and after a few trial and error attempts I managed to make a chart for the butterfly stitch.

It is a simple 'drag and drop' to make your chart. You have the choice of free style, crochet, knitting or cross stitch charts and can even upload a photo to make into a chart. You can save your designs by registering with them free of charge, all you need is an email address.

Lots of stitch symbols are there to use and they follow the common, universal, worldwide symbols that most people use. 

Below is a quick example of my chart however, if you would like to see it more clearly you can download it in pdf format from my documents if you would like to have a go, print it or just see it:
https://docs.google.com/uc?export=download&id=0B3r0r1j1kA2ZcUE5UjVJc0RfYzg

It took me all afternoon to make my chart but I'm sure with practice that time would get much shorter as I learn how to do it. There are help features that you can access at any time as you create your chart.

This is the response I got regarding the chart request on YouTube:

"Tried the Butterfly Stitch with the Chart you made for it and it was a breeze. Charts are such a welcome part of crochet over written instructions - which are the one downside to crochet in my opinion. Thanks a million"

Well that has inspired me to try some more and I think Stitch Fiddle will become my new place to play :) It is still being developed and new features are being added regularly. It is free to use and you can create a chart without any cost but you can also pay for more advanced features if you wish.

You can save charts and share them with others, edit previously made charts, change the palette of stitches to your own choice adding more or less to those that are always available in your design view. You can also print and export your chart - I'm sure there is much more that I've yet to discover too. 

Go on, have a go - if I can do it anyone can :)

and of course - thank you Stitch Fiddle!

Happy crafting!


___________________________________________________


___________________________________________________


Friday 10 March 2017

The Very Hungry Catterpillar Crochet Toy

Watch out there's a hungry catterpillar about! Lock up your fruit and vegetables :)

Loved making this for my friends granddaughter and it is really easy to do, working in the round all the sections join together in one piece so there is not lots of sewing to do! I made it in a week working on it just in the evenings now and again.

Don't make my mistake and decide to leave stuffing to the end (I didn't have any and was keen to get on with the crochet) however I managed to stuff it OK but it would have been easier to do it as I went along.

There is not a great amount of sewing, just the legs, antennae and eyes. 

To help keep the body tight I ran a long thread from nose to tail and pulled it tight sewing it firmly at each end, you don't have to do that but I felt it gave it shape.

Mine came out at around 22" long and about 5" high to top of antennae but you could make it bigger by just keep making more segments - or smaller by using thinner yarn and a smaller hook or less segments.

I used Cygnet Aran yarn in Mint and Forest green and then oddments of yarn from my stash for the other parts. 

Hook size used - 5.00 mm and 5.5 mm

Very easy to follow FREE pattern with clear instructions big thank you to Londie for sharing this for free.


Happy crocheting!


___________________________________________________


___________________________________________________


Wednesday 22 February 2017

My attempt at the Anansi Shawl by Aoibhe NĂ­

On 22nd February 2017 I decided to go on a Tunisian crochet journey and attempt to make Aoibhe Ni's Anansi Shawl. http://www.ravelry.com/patterns/library/anansi-2

I'm over the moon that I managed to complete it, it took me about a month in all.

The yarn I used, Stylecraft Senses Lace is beautiful and soft, it is like being wrapped up in a soft cloud. 


A couple of close ups of the finished design are shown below. There is a chevron design and a sweeping row of 5 lines which spiral around the shawl.


Hard to hold up but here are some close ups with the light shining through the pattern:


I really hope you will have a go yourself and if it helps you I've logged my thoughts and some tips below, all these were added as I went along the journey.

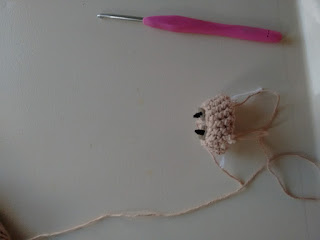
This is how it all began that cold February morning ...........

Well here goes, I've only dabbled in some Tunisian crochet so this is going to be a learning curve for me, however armed with Aoibhe's excellent written pattern, charts and YouTube video I hope to be able to make this beautiful work of art.

I hope you will join me on my journey.

I'm beginning today, February 22nd 2017 and will update this page as I go on.

My first stop was choosing a yarn, I looked through Ravelry at what other people had used and some had used Double Knit and some the recommended Lace/2ply.

Unsure what to do I had a walk to my local shops, sadly all the yarn/craft shops are now gone but a few high street stores do still sell yarn. I was thrilled to find that Boyes were selling Stylecraft Senses Lace yarn at just £1 per ball in their sale. It was like it was meant to be! So here I am about to begin in a beautiful mullberry, slightly varigated colour called Hawthorne:


23rd February 2017

Well today has been a learning curve and I've found I've been doing it all wrong!

First thing I discovered is that you can't really do this pattern with the soft grip handled crochet hooks, they do not give you enough room for the stitches, so I swapped to a proper Tunisian crochet hook.


That wasn't much of a problem and the worked started to look lovely:


I must admit I was a bit uncertain though about the jagged edge, it was hard to tell from the pattern photos but I was sure that they did not have that effect.

I had watched Aoibhe Ni's video tutorial on how to do the 'uple treble' stitches: https://www.youtube.com/watch?v=mlqzkNaIOWA
and had been using this same technique to make the Lt1, 2 3, etc. stitches as mentioned in the pattern, i.e. I was chaining the said number of chains then working the uple trebles on them, each time on top of the last. As I went along I realised that if I continued I would have the final 24 stitches, which I needed to then carry on with chart A and B, but as I had been working on top of the previous 'uples' I would have had far, far too many stitches along the working edge.

A search of Ravelry took me to a forum thread which, although 3 years old, gave the explanation of what I should actually be doing. You can see the forum posts here: http://www.ravelry.com/discuss/aoibhe-ni/2522973/1-25#2

Vivian-pearl explained it excellently on how to work on the foundation chains.... after doing the 2dc increase (note: being in the US Vivian-pearl uses the term 'sc' which is the same as a UK 'dc'):

After you have your 2 sc in the same chain:
YO and hook into the next chain and return. (creates a Ltr)
Hook the YO loop and hook into the chain, then return. (1st Ltr in ch)
Hook the line, hook into the same chain, return. (2nd Ltr in ch)
YO and hook into the line, hook into next chain, return. (creates L2tr)
Hook the YO loop, hook the line, hook into the next chain, return. (1st L2tr in ch)
Hook the 2 lines, hook into the same chain, return. (2nd L2tr in ch)

Continue in the same manner until you have made all your increases.

Once I had masted this everything began to look better and I think I am now on the right track, thankfully I had not done too much work. Let's see how things go from now on!


24th February 2017

Well another little set back but nothing that can't be sorted. I got to the end of the first section ready to do the first of the charts but realised I did not have enough chains left to work the charts on. On closer inspection I found that I had worked happily away until I had the correct number of stitches but had been missing some of the YO (yarn overs) which meant things had gone wrong.

All my fault for not counting stitches and being careful! So my advice is COUNT, COUNT and COUNT again and watch out for those yarn overs, they can get hidden amongst the other stitches (see photo added further down below). You need good light and concentration.

Anyway, I'm not one to give up (perhaps you'd noticed that :) ) so after ripping it back yet again I am now back where I should be. This time I placed stitch markers on the chains at each point where the section or chart should end and this helped me be sure I was counting correctly.

The top piece is what I had done wrong and the bottom one is correct and ready for moving on to chart A and B - you can see how much smaller and narrower the top one is, it would not have achieved the size required.


You might think that all this means the pattern is not worth trying but PLEASE do have a go, all these mistakes are my fault so don't let me put you off, it is quite easy once you understand what you should be doing and once you have done one segment then that is all there is to it, you then have to make another 10 segments exactly in the same way so it is bound to get easier because of all the practice.

We have the grandchildren to stay this weekend so there will be no updates until at least Monday but I am feeling really good about this shawl despite my mistakes I am learning from them. The yarn is soft and beautiful, although a bit of a pain to undo as it has a slight mohair feel to it and the fibres can get tangled if you are not careful, but fingers crossed this is my last rip back!

Tuesday 28th February 2017

I was able to spend quite a few hours on this yesterday and have completed the first panel. YAY! The charts A and B are easy to understand but you do need to work on it with patience and quiet concentration, certainly not something to do while watching TV - not for me anyway!

This is how it is looking so far, once finished it will need blocking which will help open up the pattern and show it in more detail. I can't fit the whole length on my table so it is folded at the plain end.


My main observation is to watch for those yarn overs, it is very easy to miss them, so remember to count all your stitches - I recommend counting on the first pass rather than the return then if you have missed one it is easy to go back.

Below is a picture of a yarn over, I hope it shows what I mean about how hidden they are, it is vital that you do not miss picking them up from the previous row or the hole which is part of the pattern will not form.


So now it is on to the next panel which is worked onto the side of the previous one, at the end you join the last panel to the other edge of the first and voila, you have a circular shawl :)

1st March 2017

I am as they say over here 'cooking with gas' and everything is working out fine. I've done the first part of the second panel and the last row arrived exactly where it should on the stitch marker I'd placed after counting where it should end. :)

I did get in a bit of a panic when looking at the diagram of the finished shawl and how the panels join together, my little 'wing' triangle was on the top side, not the bottom as in the diagram but after studying it a bit more I think the diagram is showing the reverse, so all is well.

I'm now well into the two charts for panel two and expect to go much faster now that I am fully understanding the pattern and seeing how it looks in progress.

I expect it is going to take me a few weeks to complete, yes I think there are a few mistakes but even I find it hard to see them so I doubt anyone else would and this yarn is quite forgiving as it has a slight mohair to it so hides any errors. :)

3rd March 2017

Panel two is now almost finished and it looks lovely, I am really getting into the pattern and even did a little bit while watch some TV that didn't need too much concentration.

I am really getting into the pattern and finding it easy, it's amazing how once you get into something it all becomes clear.

If you fancy having a go I can recommend it - go for it!

Panel three will begin today, not much point me keep updating unless I have some technique information to share so it might be a few days before there is another update.

10th March 2017

Just a quick update to say that it is still coming along nicely I'm almost half way through - YAY!

14th March 2017

Thought I would add a photo of the work so far, really happy with how it is coming together.

A small hitch when I was working on an area where you work a small triangle by decreasing the Ltrs. I only had the chain stitches worked and had to put it down to let the cat in who was scratching at the door, when I picked it up I must have turned the work and not realised, I ended up running out of stitches and found I had been going back the wrong way. Doh!! Please don't laugh. :) Anyway, it was only about 10 rows to undo and I was soon back on track.


20th March 2017

One panel to go! I'm getting excited now, it's looking good.

23rd March 2017

All finished! There is only a minimal amount of sewing, just join the first panel side to the last to complete the circle and then you are done. I've just pinned it out and left it wet to block and done a little dance of pure joy :)

Here it is blocked:


I hope you have a go, it is a lovely pattern to do and very rewarding when it is finished.

Happy crocheting!


___________________________________________________


___________________________________________________